
DC Motor Control using myRIO
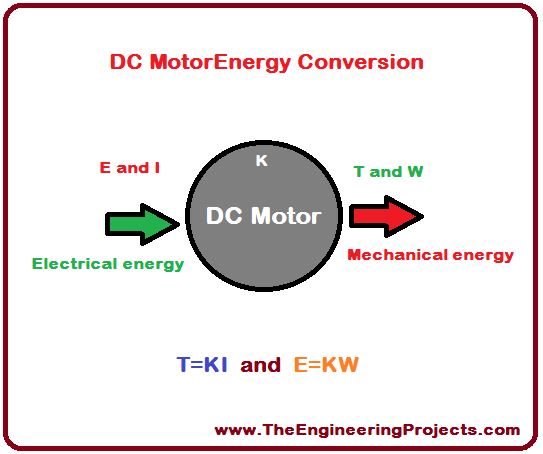
DC Motor is a device frequently used to convert electrical energy to mechanical energy. Electrical power supply is provided to the DC motor and it generates mechanical energy. DC motor has two input terminals for power supply. We can easily change the direction of rotation of DC motor just bu changing the polarity of the applied voltage across its terminals. It has a lot of applications including robotics, vehicles, lifters etc. DC motor energy conversion is shown in the figure given below.
Note
I have also made different simulation for DC motor speed and direction control, as given below. You must go through these articles fo the better understanding of this tutorial.s
- DC Motor Drive Circuit in Proteus
- DC Motor Direction Control with Arduino in Proteus
- DC Motor Speed Control using Arduino in Proteus
- DC Motor Direction Control using Arduino
- DC Motor Speed Control using Arduino
- DC Motor Direction Control in MATLAB
- DC Motor Speed Control in MATLAB
- DC Motor Direction Control in LabVIEW
- DC Motor Speed Control in LabVIEW
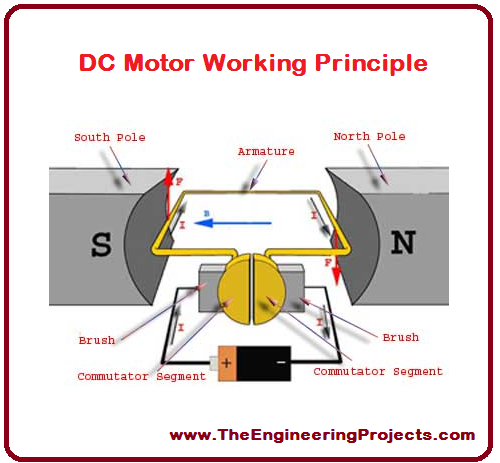
1. DC Motor Working Principle
The working principle of DC motor is pretty simple as given below.
- When a current carrying coil is placed in side the magnetic field, torque is produced as a result.
- Due to this torque, it becomes capable of rotating, usually known as the motor action.
- If we change the direction of the current in the wire, direction of rotation of DC motor will also be changes correspondingly.
- A mechanical force is produced due to the interaction of magnetic field and electric field.
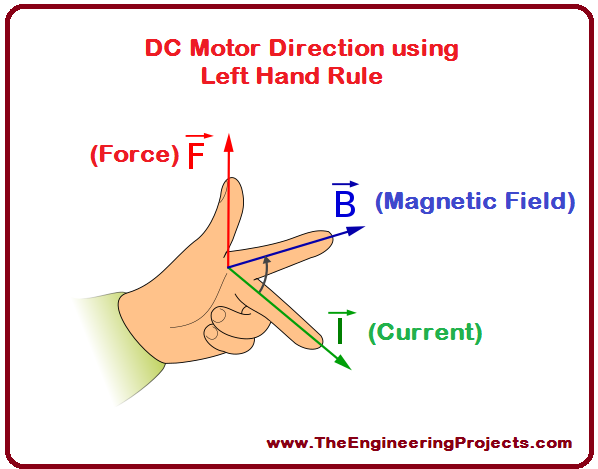
2. DC Motor Direction Estimation
- The direction of DC motor can be determined by left hand rule introduced by Fleming, a famous scientist.
- If middle finger, index finger and thumb of your left hand are extended in such a way, that all of these are perpendicular to each other.
- If the middle finger is in the direction of current and index finger represents the magnetic field.
- Then thumb of your left hand will show the direction of rotation of the DC motor.
- This left hand rule is shown visually in the figure given below.
3. Source code description
- Go to the block diagram window and press Ctrl+Space bar.
- You will see a new window named as Quick Drop has been appeared on your screen.
- Type PWM in that window as shown in the figure given below.
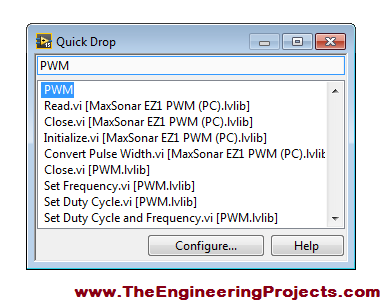
- Pick the blue colored highlighted box and place it over block diagram window, a new window will be appeared on your screen
- The newly appeared window is shown in the figure given below.
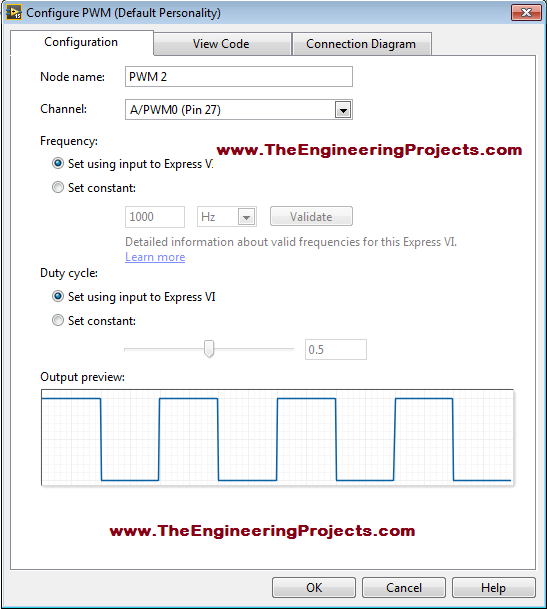
- Just press OK, and your block diagram window will look like the figure shown below.
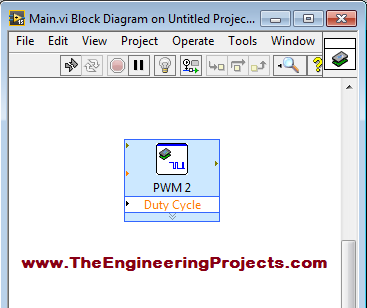
- Now to input terminal of duty cycle and right click on it.
- Go to Create->Control as shown in the figure below.
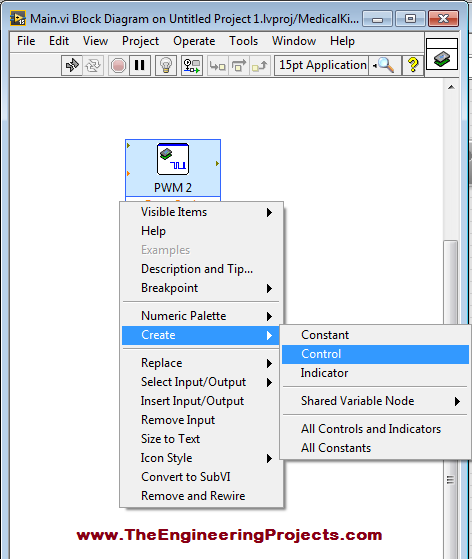
- After doing so your block diagram window will look like the figure shown below.
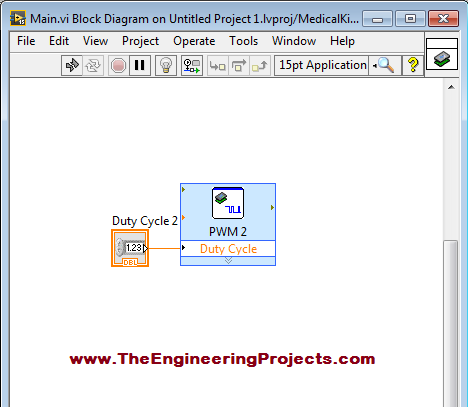
- Now right click on block diagram window.
- Go to Functions->Programming->Structures->For Loop.
- Select while loop and place it over block diagram window.
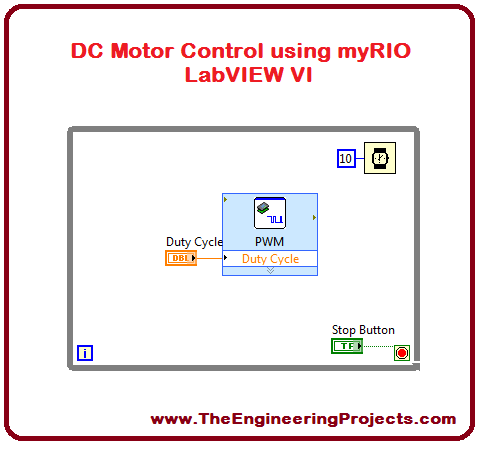
3. DC Motor Control using myRIO VI
- A complete NI LabVIEW VI for DC motor control using myRIO is shown in the figure given below.
- You can download the complete NI LabVIEW VI here by clicking on the button below.
This is all from the tutorial DC Motor Control using myRIO. I have provided a lot detail about the working of DC motor and its control through myRIO. I have also provided the complete NI LabVIEW VI for DC motor control using myRIO. I hope you enjoyed the tutorial. If you feel any problem, you can ask us in comments. We will try our level best to solve your issues. I will also share further tutorials on NI myRIO. So, till my next tutorial taker care and bye 
JLCPCB – Prototype 10 PCBs for $2 (For Any Color)
China’s Largest PCB Prototype Enterprise, 600,000+ Customers & 10,000+ Online Orders Daily
How to Get PCB Cash Coupon from JLCPCB: https://bit.ly/2GMCH9w
The post DC Motor Control using myRIO appeared first on The Engineering Projects.
No comments:
Post a Comment